The purpose of this blog post is to provide the guidance and the steps needed to create a Ubuntu virtual machine (VM) in AWS. In this example, I am going to use Ubuntu Server 22.04 LTS as the OS (Operating System). Please keep in mind that the settings, options, descriptions, etc. may be different for each use case.
- Log into the AWS Portal with your AWS credentials (for example, abcd@email.com) and you should be directed to the AWS Console Home page:

- Scroll halfway down and select Launch a virtual machine under Build a Solution:

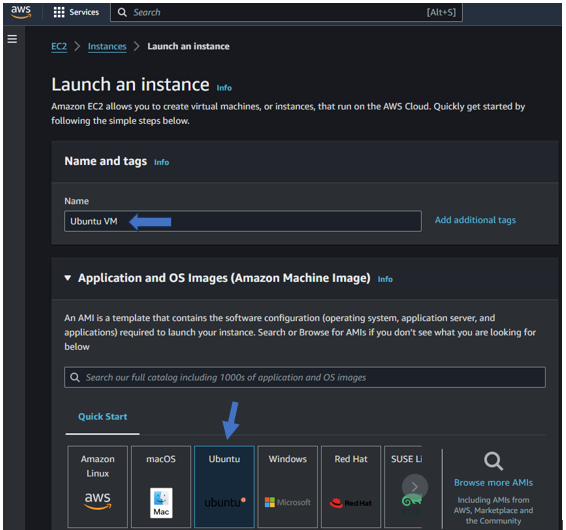
- At the Launch an instance window, you will be prompted to provide a name for the VM, the desired OS (operating system), the Amazon Machine Image (AMI), the preferred architecture (64-bit (x86) or 64-bit (ARM), the instance type, key pair (login), network settings, firewall (security group), storage, and any advanced details you may be interested in:


- Once you’ve reviewed and confirmed your selections under Summary, please select Launch Instance:

- You’re the instance has been successfully created, you’ll be able to access it shortly thereafter:

- Select Instances to view any EC2 instances that have been created up until this point:

- The VM instance is available for use once the status under Status Check changes from Initializing to 2/2 checks passed:

If I have missed anything or if you have any suggestions, please let me know.
If you’re interested in anything related to AWS on my blog, please click on this link

Leave a comment